
Last week we ran our very first interactive screencast with the goal of helping our new resellers learn the basics of the OpenSRS and our control panel interface.
Pulling off a live video screencast, with multiple components was challenging and took some time to figure out. With the right tools and services though, I was impressed with what we were able to accomplish on a small budget.
In this post, I wanted to share with you some of the equipment we used to put together our Interactive Screencast using Ustream and offer up some of the things we learned during the process.

If you have any questions, just leave a comment and I’ll be happy to describe the various components in more detail in another post, or maybe in a live screencast.
One of the core ideas behind these screencasts was that we wanted our resellers to see us (more specifically, our faces) at various times throughout the show. I don’t know the research behind my thinking, but having our resellers see the faces of myself and our colleagues, even if for a moment is an important component.
As humans, we make better connections with each other when we can see faces of those with something to say. It was tough to put ourselves on camera at first. In addition to the technical challenges, it can be intimidating to know that people are watching you live and was something we had to adjust to over countless hours of rehearsals.
It’s pretty easy to get up and running right away with services such as Livestream, Ustream, Justin.tv and others. As you dig deeper, there’s some pretty powerful stuff though, and the learning curve begins to steepen.
A view from our makeshift studio
We just grabbed a meeting room. You don’t need a lot of space, but lighting is important. This meeting room was *very* dark, so it was lit using a Halogen light from Home Depot. In future, we’ll have a more usable solution, but the halogen worked in a pinch (but they sure heat up in a hurry!)

MacBook Pro
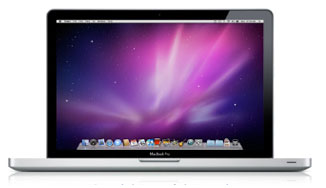
With enough light, the built-in MacBook Pro webcam offers a pretty clean, vibrant picture and was more than adequate to act as our primary host camera. Ustream will also work fine with a PC, but you may have trouble doing higher-quality broadcasts if your laptop is not fast enough.
Although we chose the Snowball USB microphone, we also found the built-in microphone on the MacBook Pro worked very well. So well in fact, that I wouldn’t hesitate to use it during future screencasts.
Logitech Cam 9000
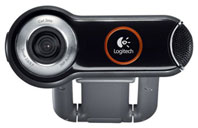
The Logitech camera was set up on the secondary monitor and trained on Russell. It’s a great camera, with good quality and a wide-angle. If you’re using a Mac, you want to make sure that your secondary webcam is supported. I was surprised to learn that many webcams are not Mac compatible. And since webcams are built-in on most Macs, there’s not a huge market for webcams either.
Screenflow
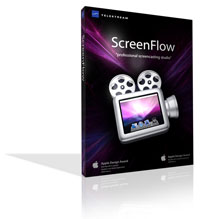
Screenflow is awesome. If you’ve never done a recorded screencast before and are just starting out, you’re in for a real treat. The interface and intuitiveness of the program will have you producing professionally recorded screencasts in no time flat.
We used Screenflow to pre-record a number of how-to videos that could then be played back during our live presentation. There are a number of really good reasons to do this.
First, it means that you can control the pace of the training. You won’t have to worry about the speed of the web server, or showing information not relevant. You can also zoom in and out of certain sections to give viewers a magnified view of what you’re doing.
Second, and probably more important, it buys you time. During a 1-2 minute recorded session, Russell and I were able to watch the chat window and see what our resellers were asking. Our time was being used more effectively this way. It also makes the shows easier to put on and allows us to build a library that can be distributed later.
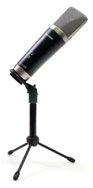
Snowball Microphone from Blue
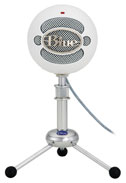
The Snowball mic, by Blue Microphones, is meant for setting up in the middle of a table and will pick up conversations from those speaking. Since it’s so good at picking up audio though, you want to make sure the room your broadcasting from is already quiet. There are also different settings on the Snowball that change how the mic picks up audio in the room, depending on your scenario.
You’ll find Snowball at an electronics retailer near you and learn more about it on the Blue website.
M-Audio Producer USB Condenser Microphone
This is a great microphone that we used to produce some of the pre-recorded videos. It only picks up sounds closest to the mic, so it wouldn’t be useful during the live broadcast, but the audio quality was excellent for everything else. In addition to the microphone, we spent invested $25 on a windscreen to limit plosions and P-pops (annoying sounds that happen when pronouncing certain letters, such as ‘P’).
Halogen Light from Home Depot
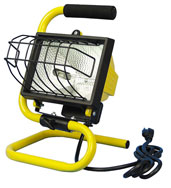
This might be laughable, but when we needed bright light, it worked in a pinch. We’re going to be setting up more permanent lighting solutions in the future, but this $15 construction light helped add a level of vibrance to the relatively dark and gloomy appearance on the webcams. For more professional and relatively inexpensive lighting options, check out pretty much any professional camera store. In Toronto, Vistek would be my first choice.
Wireless Keyboard and Mouse
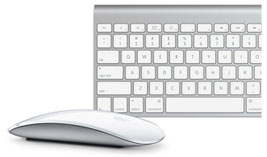
Having a wireless keyboard and mouse was extremely convenient and meant that Russell could run through a demonstration of our control panels while sitting in front of the secondary monitor connected to my Mac. With a little coordination, we got pretty good at “returning the mouse pointer” to the correct screen when we needed to hand it off to each other.
A note about camcorders
We have two camcorders at OpenSRS. One is a standard definition model that supports Firewire which was automatically recognized by my Mac and Ustream. The other is an HD model that we couldn’t use without purchasing additional hardware. In the end, we decided the webcams were easier to set up and use although, we’ll probably come back to the camcorder set up at some point, given their high video quality.
Tips and ideas
- Just like disc jockeys at a radio station, consider integration pre-recorded videos, so you can read what’s happening in chat, talk about the next step with your screencast partner.
- Always have a partner! It’s not a requirement, but having somebody with you always makes a bumpy ride smoother.
- Newer camcorders don’t seem to have Firewire, and USB doesn’t always work (USB is used for uploading a video, not always enabled for live streams.
- Use a second laptop as a teleprompter, positioned just above your webcam. When you’re reading the text, you’ll be looking into the camera.
- Throw in some music! Our screencast has a little bit of music just as part of the intro screen. It only takes a little bit to spice things up.
- Consider adding titles that fade in. Ustream Producer makes this really easy and it helps your viewers remember your name and what you do (if you also include your title)
- Rehearse, rehearse, rehearse. We learned an awful lot about Ustream, our local setup, and our presentation flow by practicing over and over. Preparation is the key to a successful live screencast.
- We paid $200 to upgrade to the Pro version of Ustream Producer. Having Pro meant that we could broadcast higher definition video which is important when doing screencasts.
I hope this post provided you with some insight into how simple it is to put together your own screencast and I’d love to hear your comments and questions if you have any!